Running Tor (Mac)
Contents
Install Homebrew
-
If you do not already have Homebrew installed, follow the installation instructions here. TLDR: Open the Terminal and paste the following line:
/bin/bash -c "$(curl -fsSL https://raw.githubusercontent.com/Homebrew/install/HEAD/install.sh)" -
You will be prompted for your system password before installation; proceed with entering your password. You may be asked more than once.
-
You will be notified which directories Homebrew is going to create. Hit
RETURN: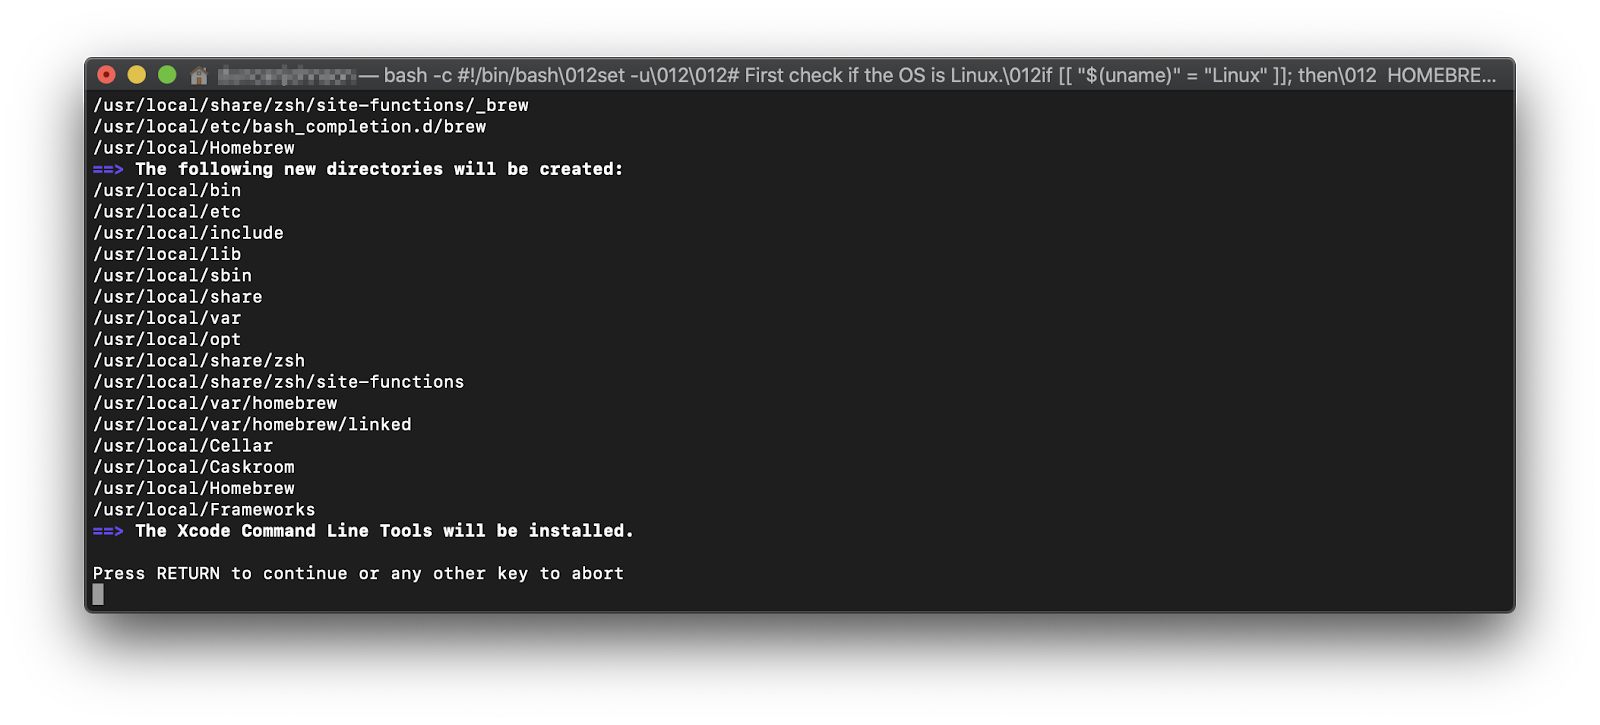
-
Homebrew may take a few minutes to download and install everything it needs.
Homebrew uses Google Analytics to collect anonymous usage data. You can deselect the option to share usage data by opting out
Install Tor
-
If you have the Tor Browser open, close it and quit the application.
-
Open the Terminal app and install Tor using the following command:
brew install tor -
Then start Tor with:
brew services start torThis will start Tor and ensure that it is always running, even after a restart. See the Tor Project docs for more details.
Enable Tor System-Wide
Content
Sonoma (MacOS 14)
-
Enable the proxy autoconfig file (This will download the Start9 standard proxy config file. You can use your own if you prefer):
sudo curl https://start9.com/assets/proxy.pac --output /Library/WebServer/Documents/proxy.pac -
Enable Apache:
sudo launchctl enable system/org.apache.httpd sudo launchctl kickstart system/org.apache.httpd -
Go to
System Settings > Networkand select the interface to edit. We recommend editing both Ethernet and WiFi. First do one, then the other: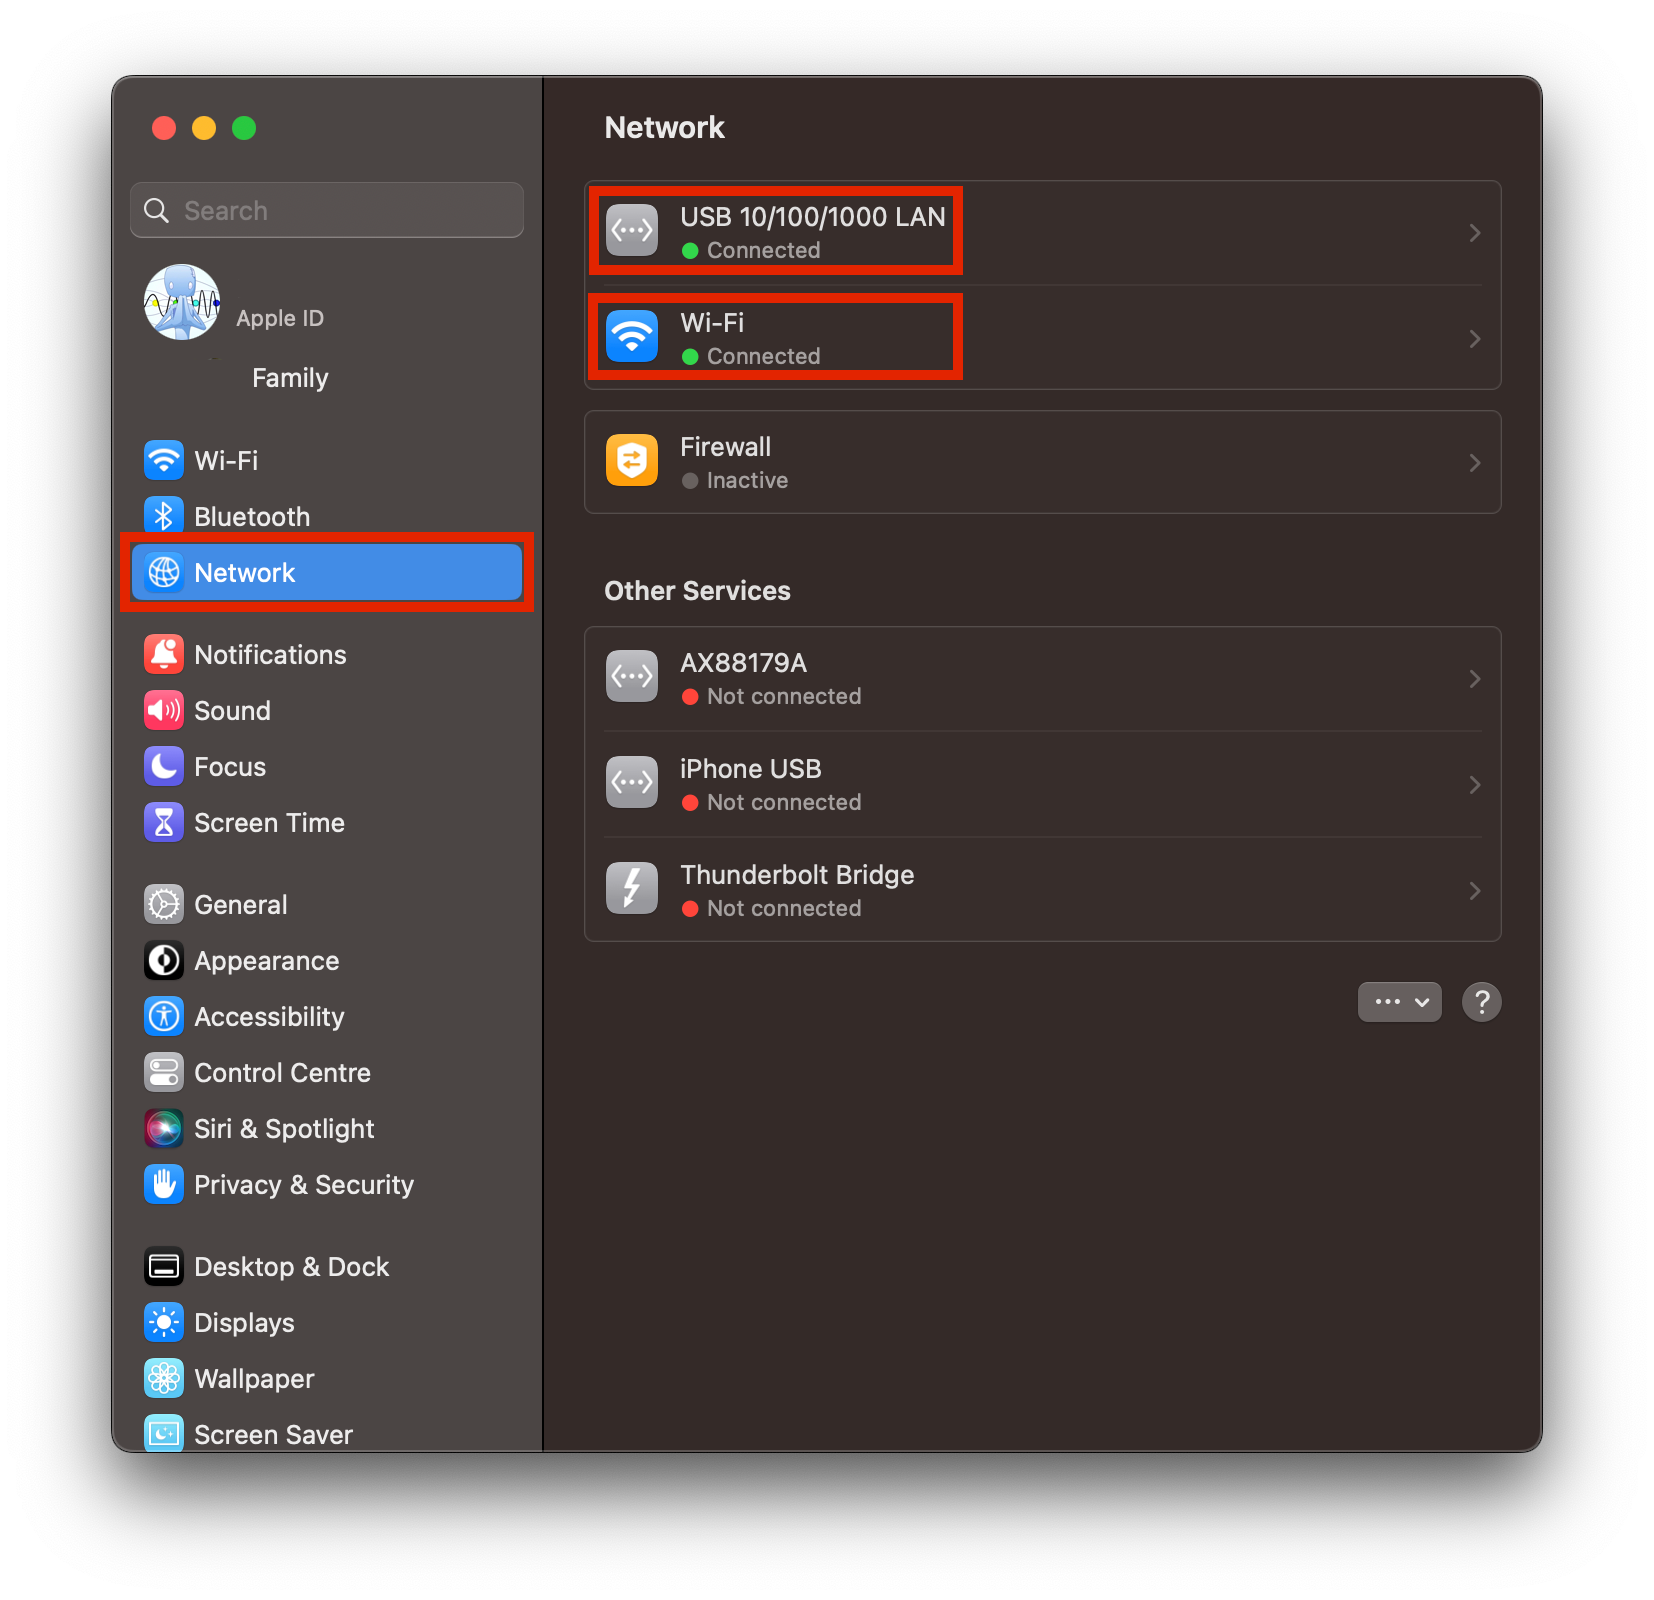
-
Click
Details > Proxiesand paste the following URL into "Automatic Proxy Configuration":http://localhost/proxy.pac. Click "OK".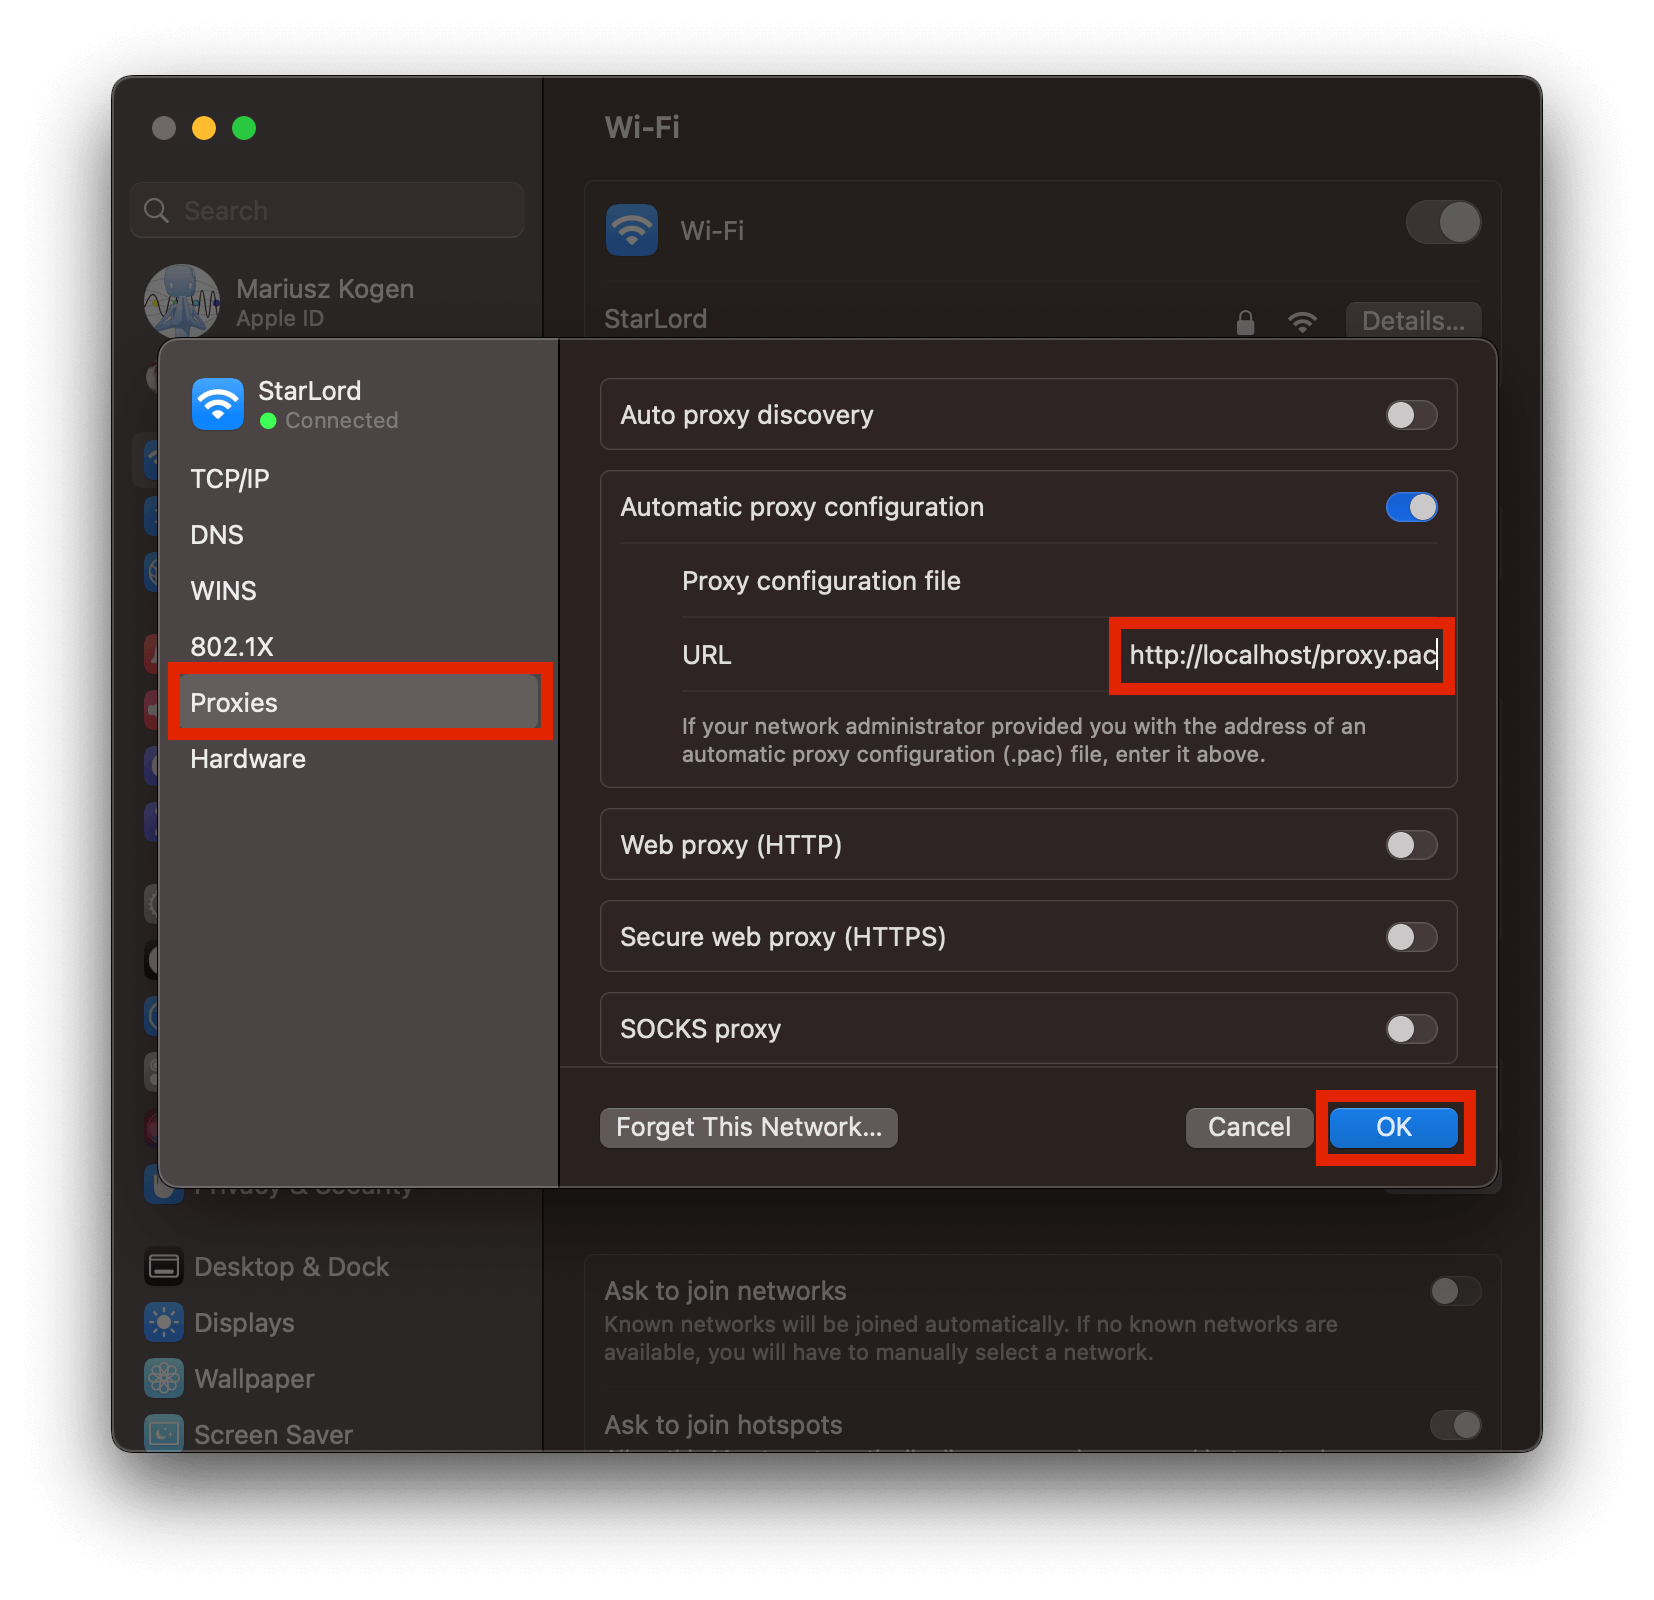
-
Repeat the previous two steps for Wifi/Ethernet, depending on which interface you haven't done yet.
Pre-Sonoma (MacOS 13 and Older)
-
Enable the proxy autoconfig file (This will download the Start9 standard proxy config file. You can use your own if you prefer):
sudo curl https://start9.com/assets/proxy.pac --output /Library/WebServer/Documents/proxy.pac -
Enable Apache:
sudo launchctl load -w /System/Library/LaunchDaemons/org.apache.httpd.plist -
Go to
System Preferences > Networkand select the interface to edit. We recommend editing both Ethernet and WiFi. First do one, then the other: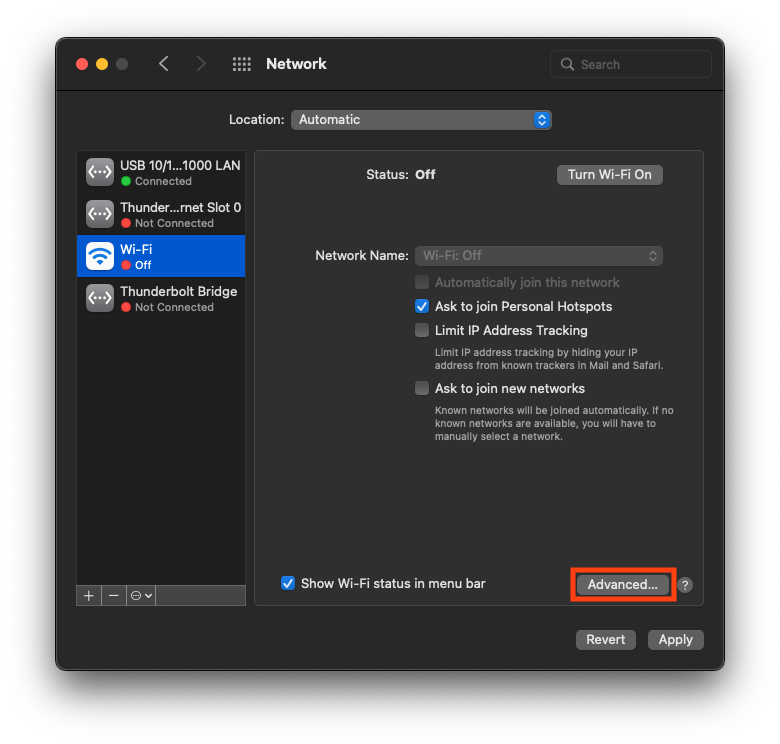
-
Click
Advanced > Proxiesand paste the following URL into "Automatic Proxy Configuration":http://localhost/proxy.pac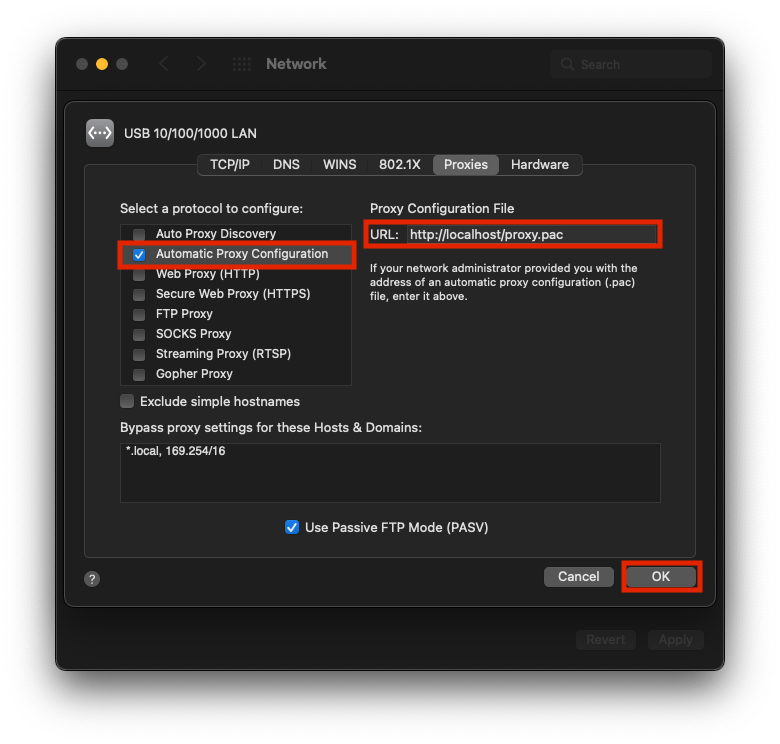
-
Repeat the previous two steps for Wifi/Ethernet, depending on which interface you haven't done yet.