Thunderbird
Content
Calendar Syncing
You can set up your devices using their integrations, but if you wish to use a standalone client for your Calendar and Contacts syncing, we recommend Mozilla's Thunderbird.
-
Install the Calendar and Contacts apps in Nextcloud if they are not currently installed.
-
Add your RootCA to your system and then configure Thunderbird.
-
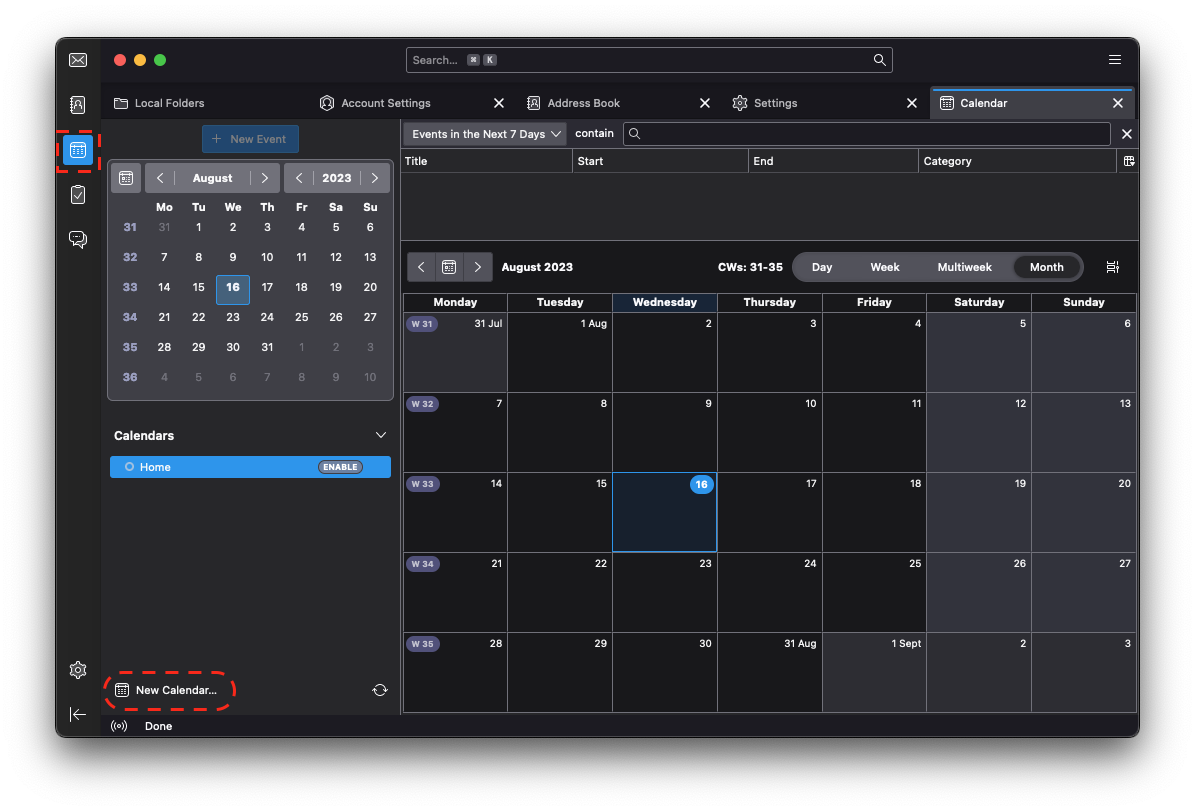
In Thunderbird, click on the calendar icon, then "New Address Book" in the bottom-left.
-
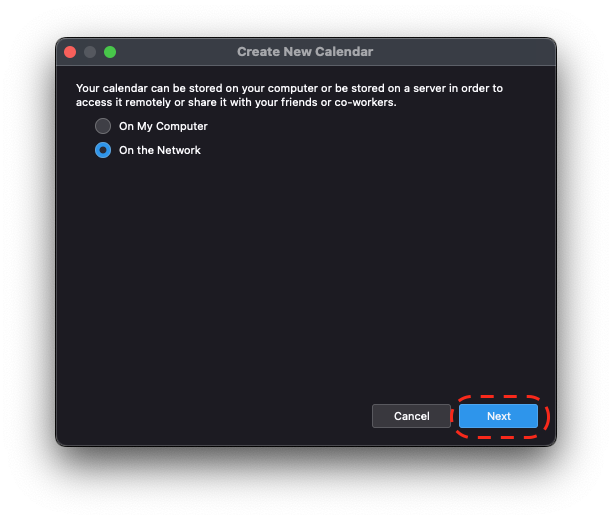
Choose "On the network," then click "Next".
-
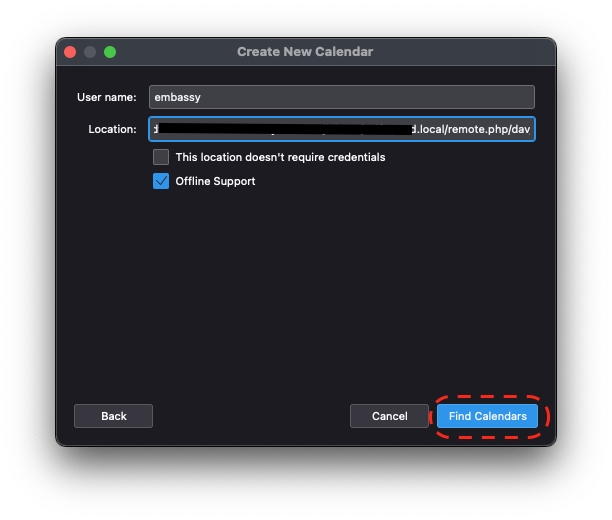
Fill in the Username and Location fields with the credentials from Nextcloud > Properties on your Start9 server. Click "Find calendars".
-
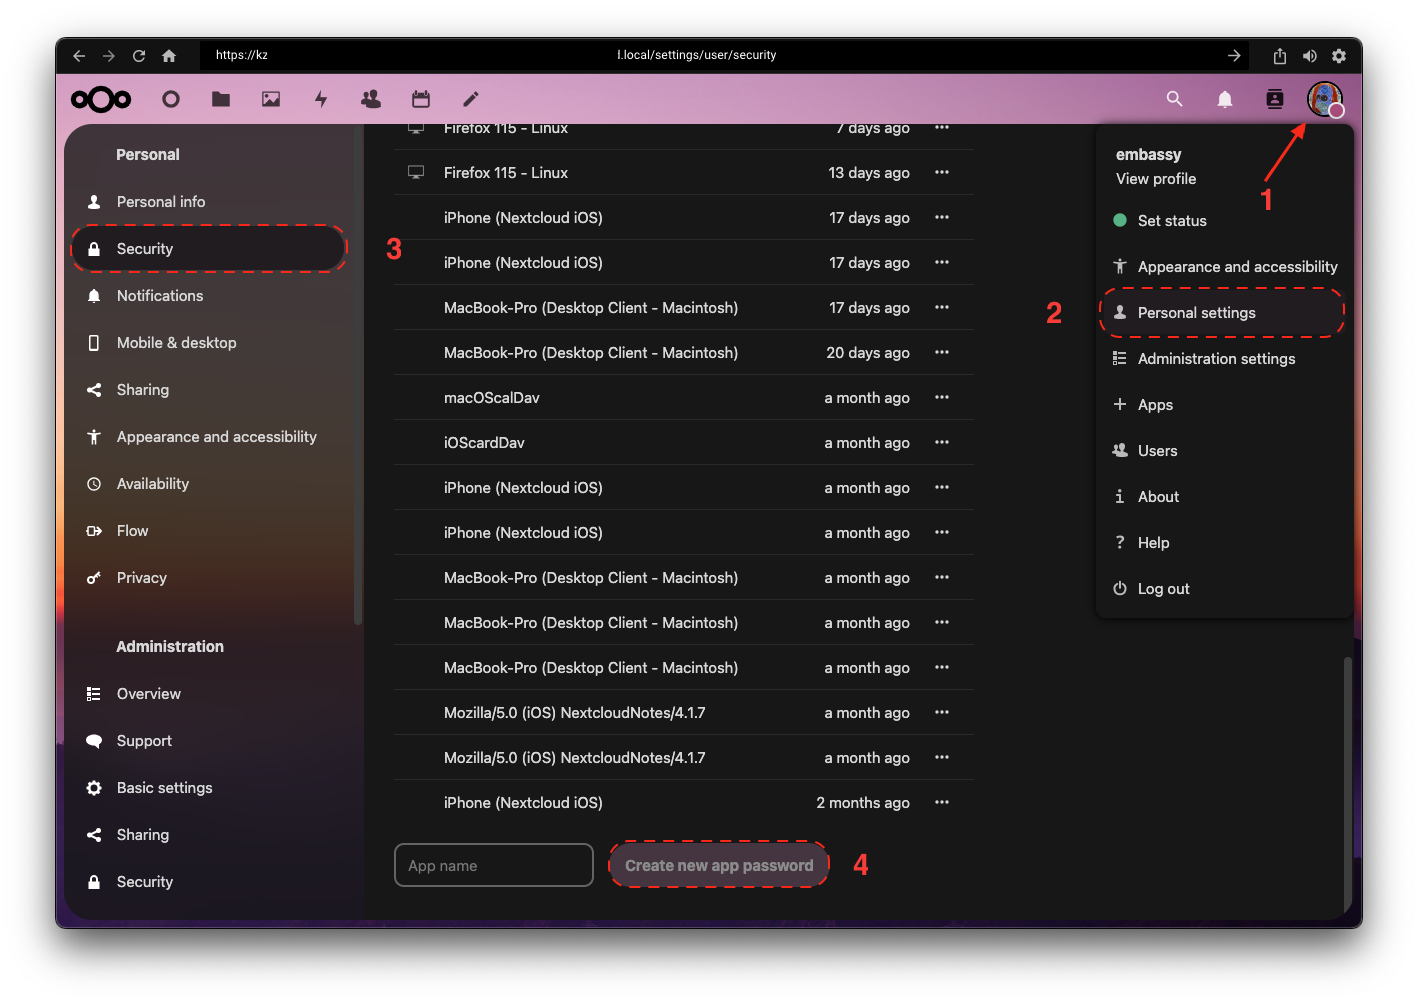
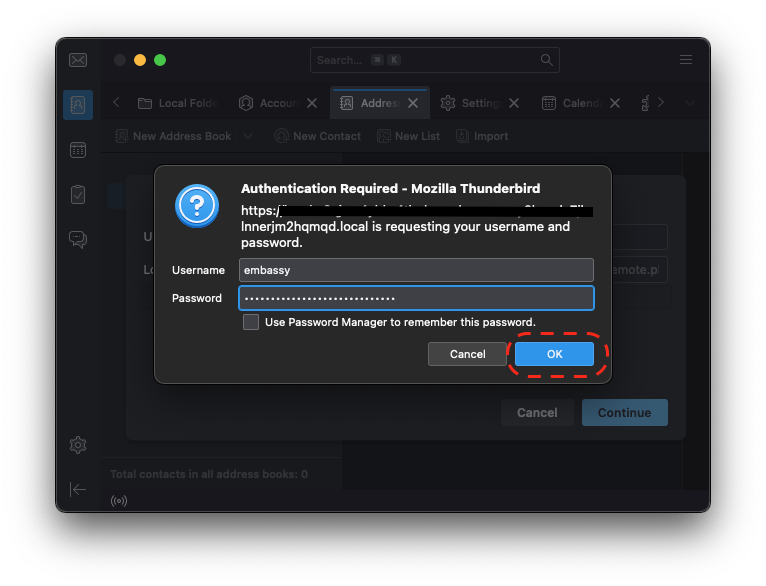
Create a unique app password - In your Nextcloud WebUI, visit the top-right-hand menu and select "Personal Settings" -> "Security." At the bottom, under "Devices & Sessions," create a new app password with a name of your choice, such as "CalDAV." Copy the resulting password and paste it into Thunderbird.
-
Check which calendars you want to integrate and click "Subscribe".
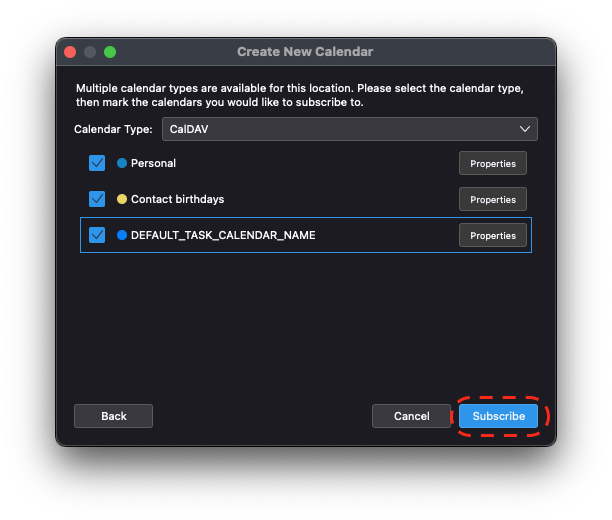
Your Nextcloud calendar will now sync with Thunderbird. Click on the "Contacts" tab above to add your contacts.
Contact Syncing
-
Install the Calendar and Contacts apps in Nextcloud if they are not currently installed.
-
Add your RootCA to your system and then configure Thunderbird.
-
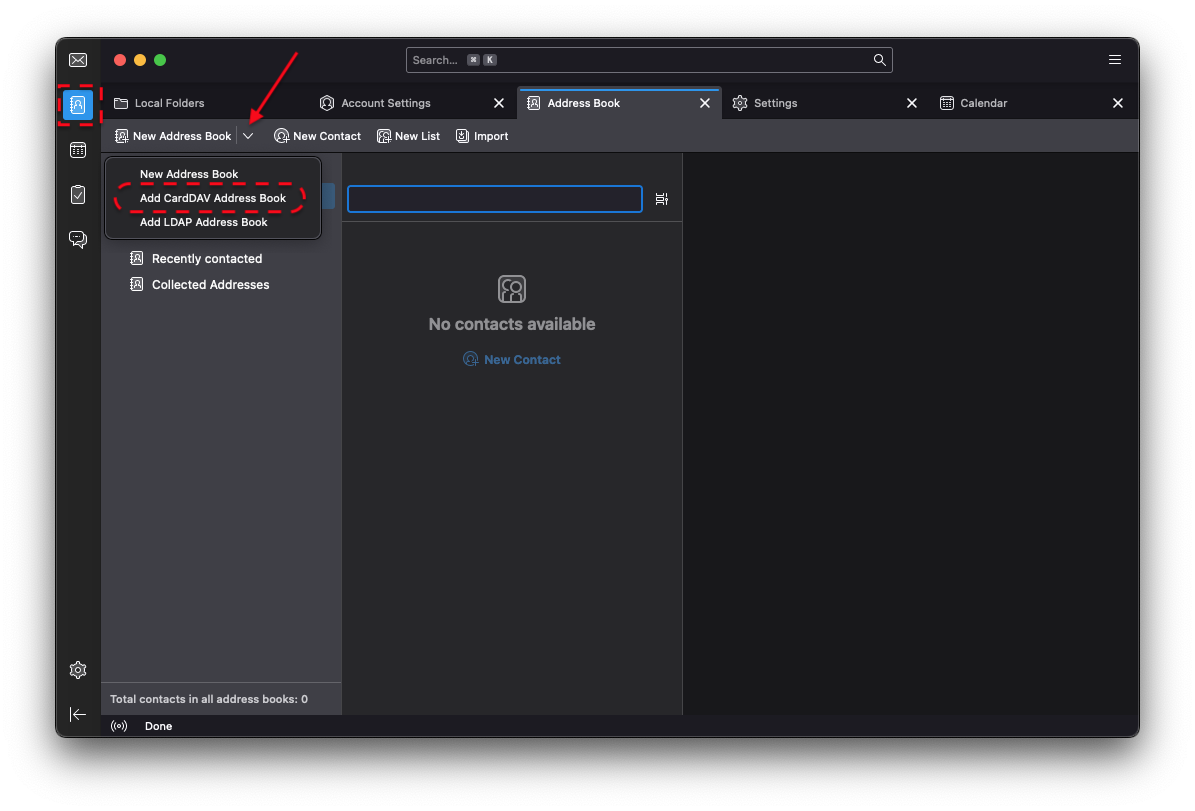
Click on the Address Book icon, open the drop-down menu for "New Address Book" and click "Add CarDav Address Book".
-
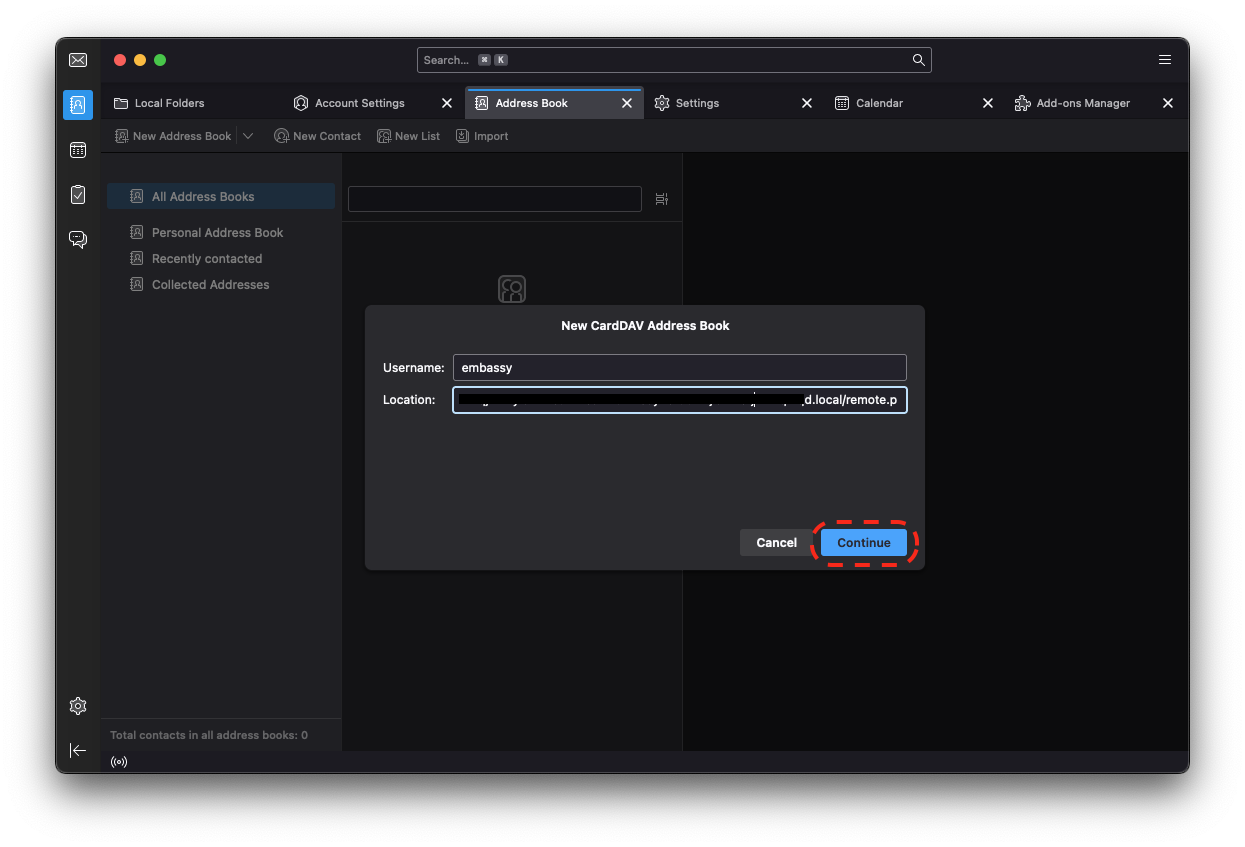
Fill in the Username and Location fields with the credentials from Nextcloud > Properties on your Start9 server. Click "Continue".
-
Create a unique app password - In your Nextcloud WebUI, visit the top-right-hand menu and select "Personal Settings" -> "Security." At the bottom, under "Devices & Sessions," create a new app password with a name of your choice, such as "CalDAV." Copy the resulting password and paste it into Thunderbird.


Your Nextcloud contacts will now sync with Thunderbird.