Organizations in Vaultwarden
Creating an Organization
If you want to share passwords amongst friends or family, you can do so using the Organizations feature of Vaultwarden.
-
Inside your Web Vault, click
New Organization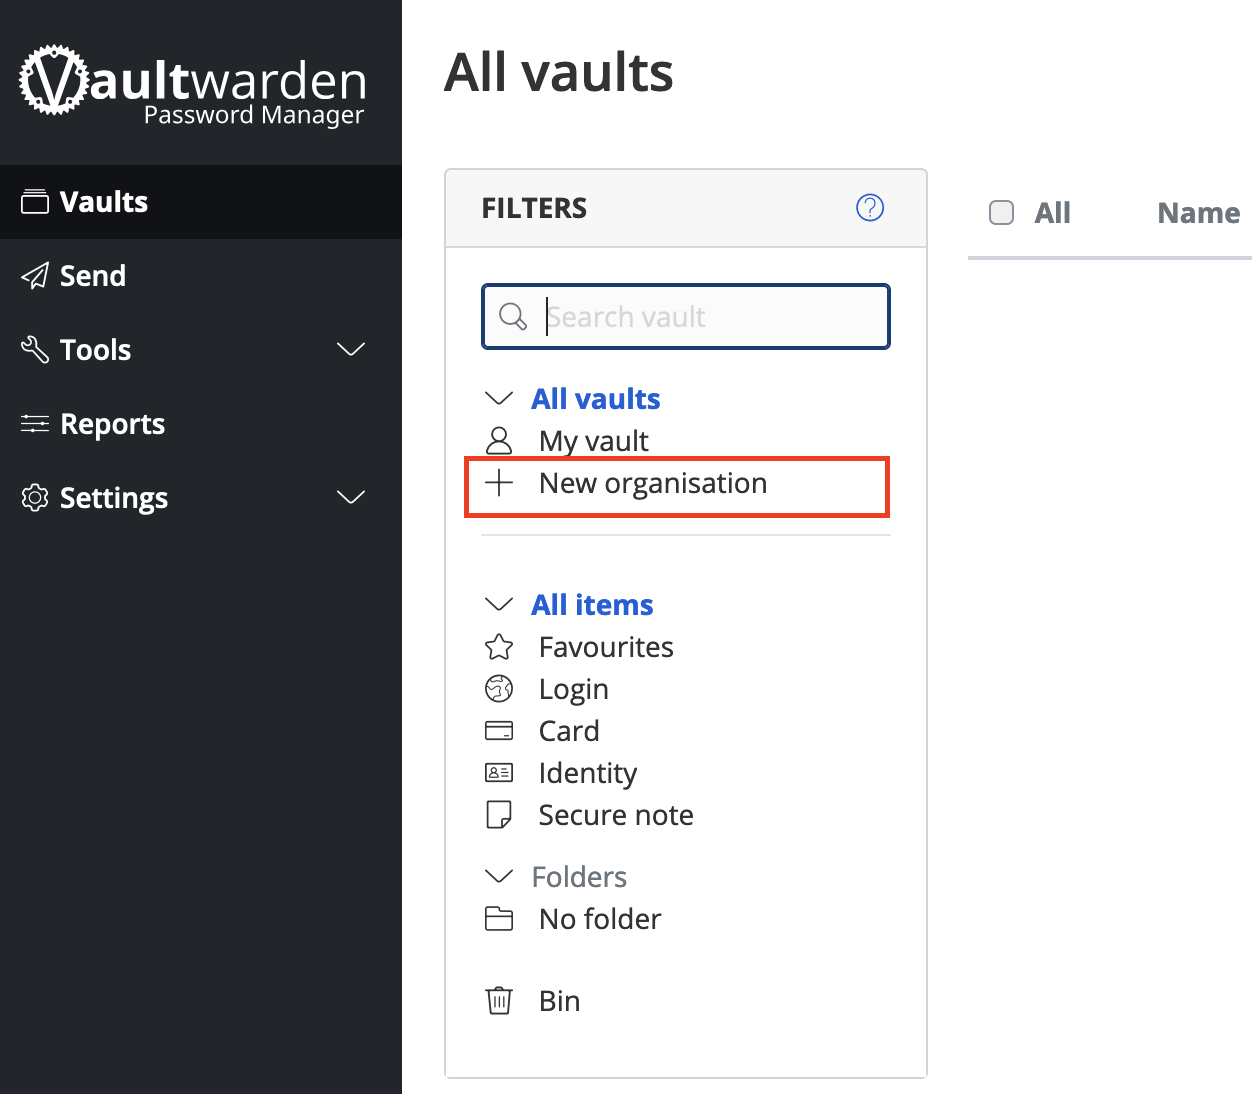
-
Give your organization a name and enter your email.
You can enter whatever you want for email, even **fake@email.com**. Because you are self-hosting, the email is not used for anything at all.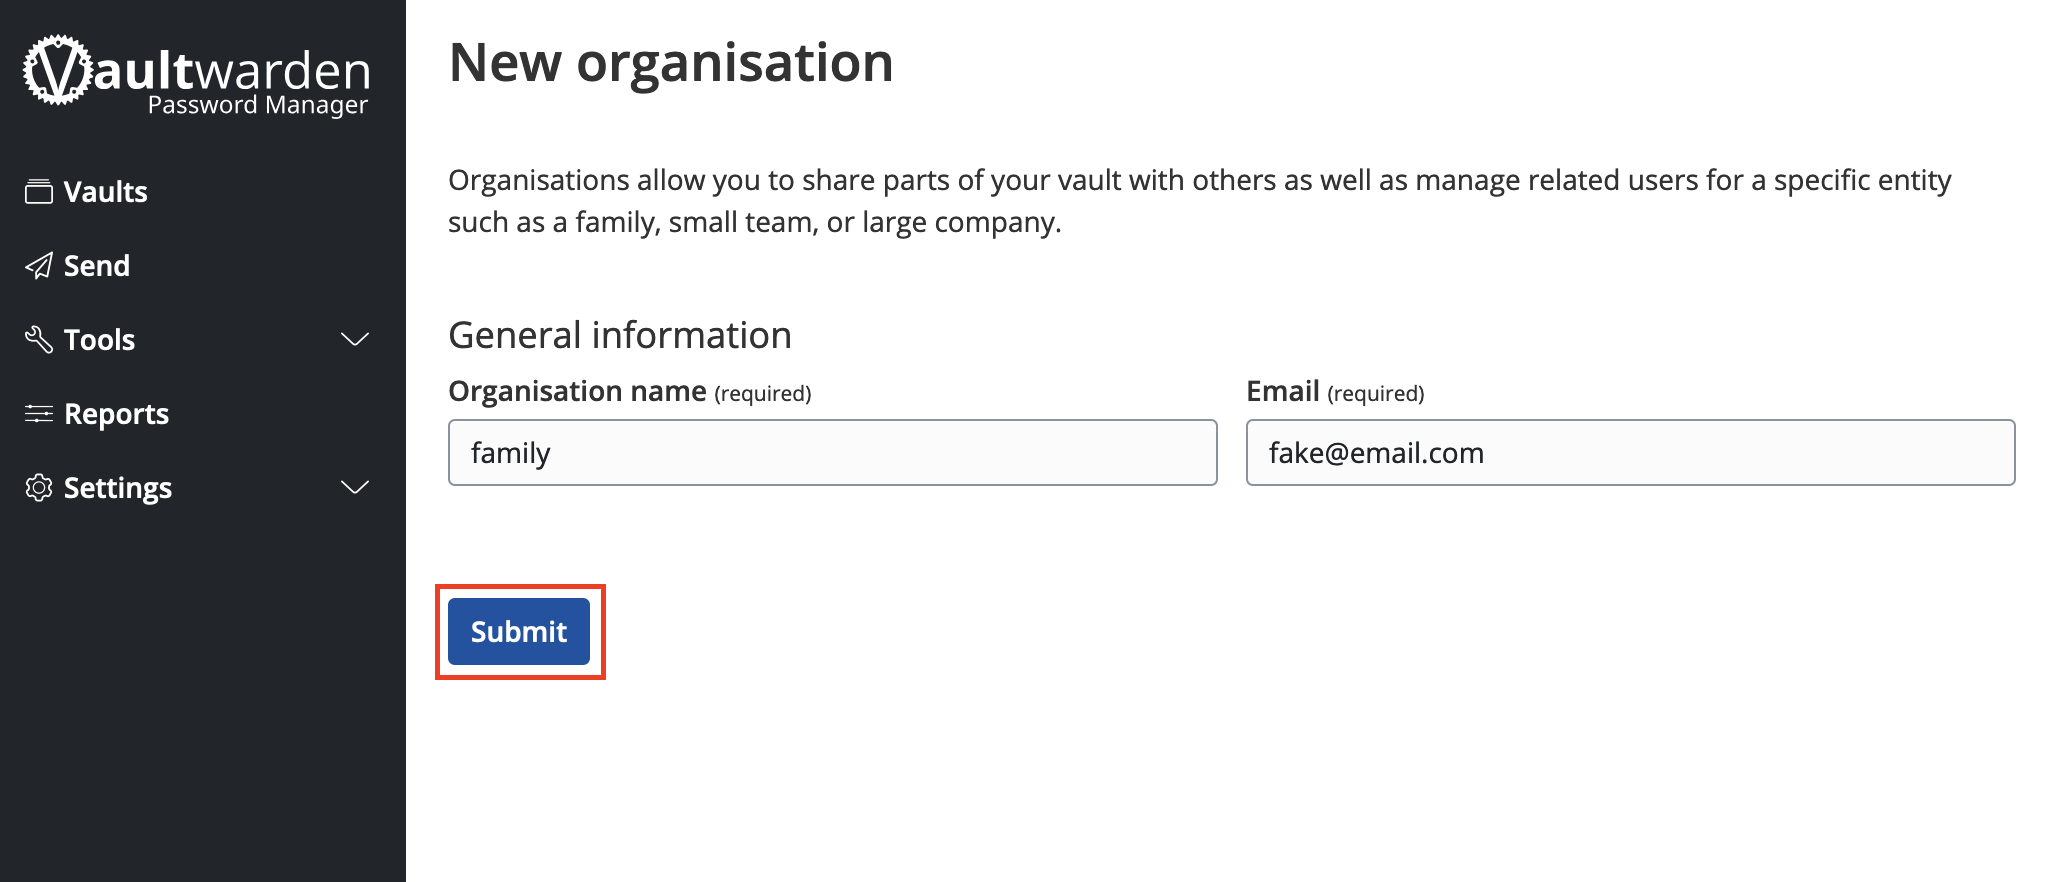
Adding Others to Your Organization
After you have completed signed up new members to your Vaultwarden server, it is highly recommended that you disable new user signups inside your Vaultwarden Admin Dashboard --> General Settings --> Allow new signups --> uncheck the box.
-
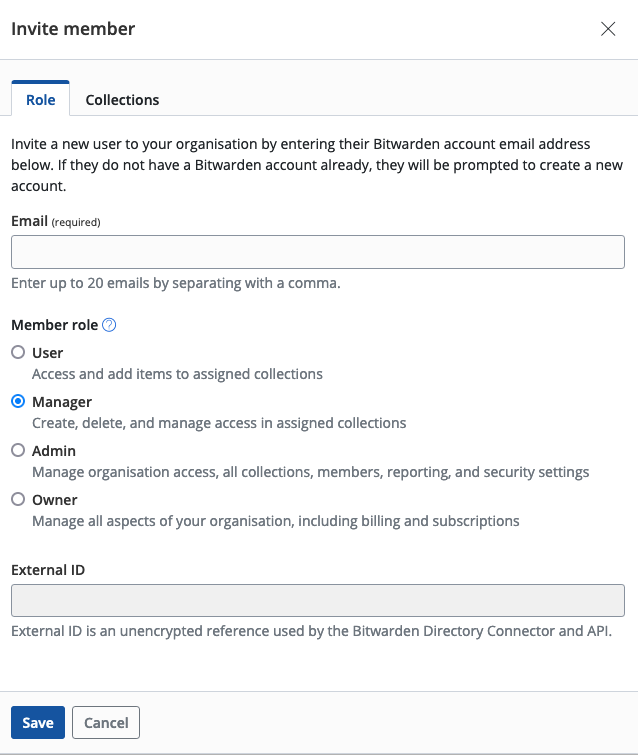
Tell the user to create an account on your Vaultwarden server. This must be done before you invite them.
-
Inside the Organization page, click Members -->
Invite member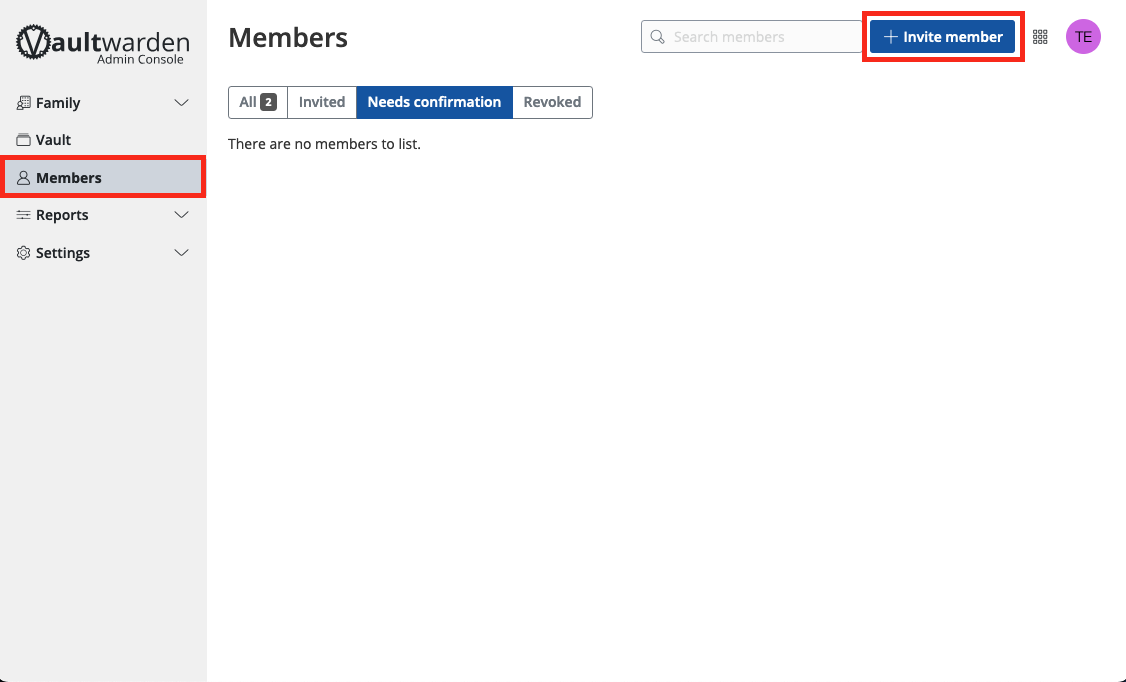
-
Decide what permissions you want the member to have and click "Save". In the below example, the member will be a manager.
-
The new member should automatically show as
Needs confirmation. If the user shows asInvited, Remove their account by clicking the settings icon to the right of their email address, and make sure they create account before you invite them, as mentioned in Step 1. Once they show asNeeds confirmation, select user checkbox and click the settings icon on the right and click "Confirm selected".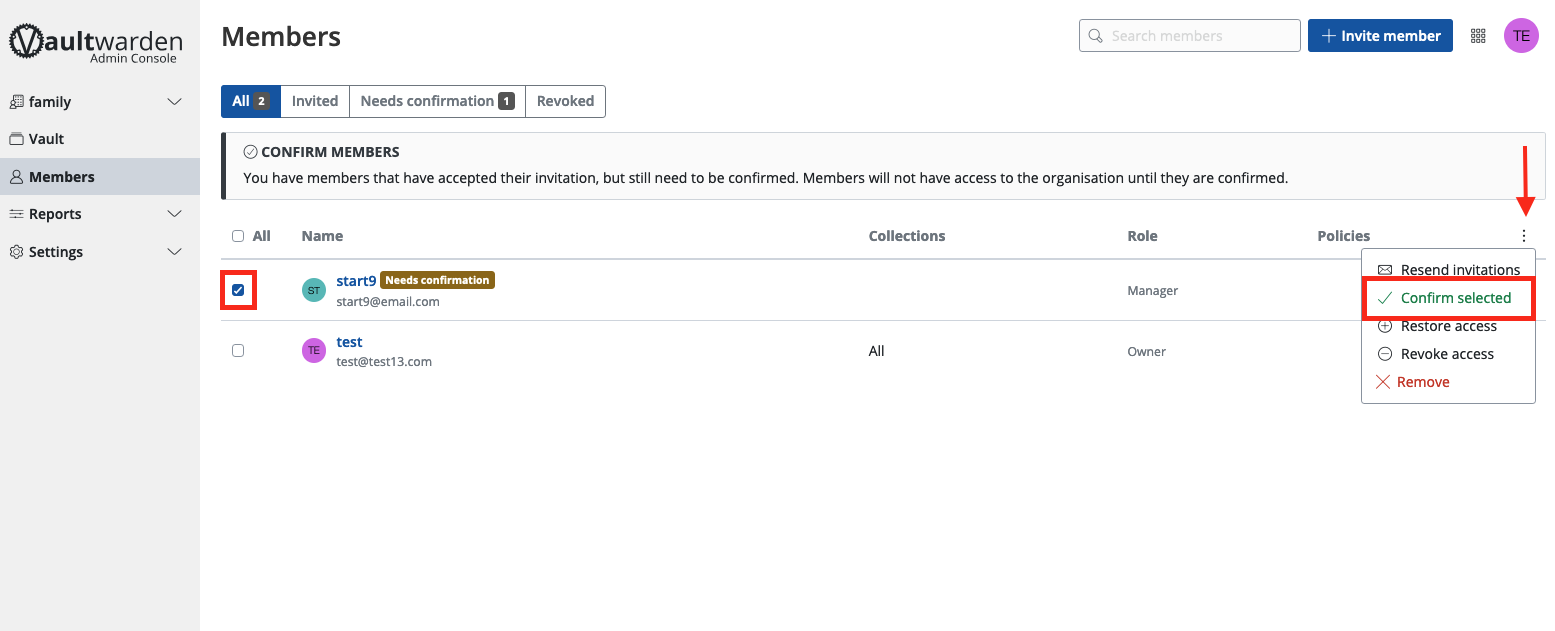
-
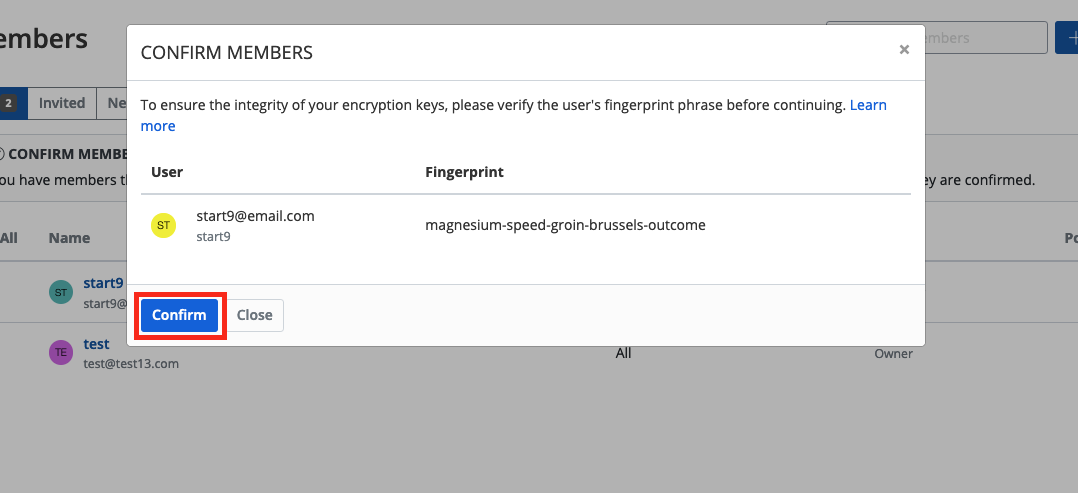
You will be presented with a fingerprint phrase. The new member can verify this phrase inside their own dashboard, but because you are self-hosting and adding users manually, you can just click "Confirm".
The new member should now be able to see the organization in their own dashboard or client apps.